

UFACTORY xArm Guide: xArm 5, 6 and 7 Price, Specs and Setup
The UFACTORY xArm family explained: live US prices for xArm 5, 6 and 7, Lite 6 and UFACTORY 850, verified specs, first-day setup with UFACTORY Studio, the Python SDK and ROS 2, and the error codes owners hit most.
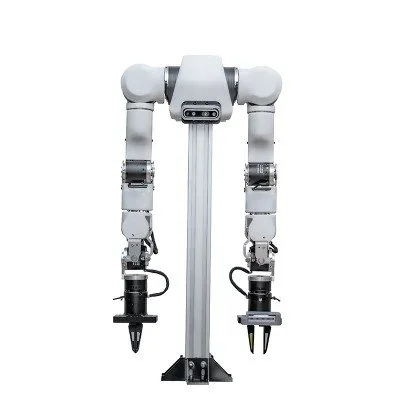
UFACTORY's xArm is a family of carbon-fiber and aluminium collaborative arms that share one controller, one web interface and one open-source SDK. That shared software is the reason labs pick it: the same Python script, ROS 2 driver and MoveIt configuration run on a 5-, 6- or 7-axis arm, and on the smaller Lite 6 and the larger UFACTORY 850. This guide covers what each model costs from our US store today (prices below update from the store automatically), the specifications UFACTORY publishes, how to get from crate to first motion, and the errors new owners run into.
Short answer: the xArm 6 is the default research and automation arm in the family. Choose the xArm 7 when you need a redundant joint to reach around obstacles, the xArm 5 for planar pick-and-place on a budget, the Lite 6 for teaching and very light payloads, and the UFACTORY 850 when you need more reach and tighter repeatability.
xArm prices in the US (live)
| Model | Our price | Axes | Payload | Reach |
|---|---|---|---|---|
| xArm 5 | $6,000.00 | 5 | 3 kg | 700 mm |
| xArm 6 | $9,500.00 | 6 | 5 kg | 700 mm |
| xArm 7 | $11,798.00 | 7 | 3.5 kg | 700 mm |
| Lite 6 | From $3,500.00 | 6 | 600 g | 440 mm |
| UFACTORY 850 | $10,500.00 | 6 | 5 kg | 850 mm |
| xArm Gripper | $2,500.00 | accessory | ||
| 6-Axis Force Torque Sensor | $3,500.00 | accessory |
The arm listings do not include a gripper or camera. Budget for the end effector, a depth camera if you plan to use vision, and a mounting table at the same time as the arm. Each product page shows current availability and the delivery estimate.
Specifications
From UFACTORY's xArm product page, Lite 6 page and UFACTORY 850 page:
| xArm 5 | xArm 6 | xArm 7 | Lite 6 | UFACTORY 850 | |
|---|---|---|---|---|---|
| Degrees of freedom | 5 | 6 | 7 | 6 | 6 |
| Payload | 3 kg | 5 kg | 3.5 kg | 600 g | 5 kg |
| Reach | 700 mm | 700 mm | 700 mm | 440 mm | 850 mm |
| Repeatability | ±0.1 mm | ±0.1 mm | ±0.1 mm | ±0.5 mm | ±0.02 mm |
| Max TCP speed | 1 m/s | 1 m/s | 1 m/s | 500 mm/s | 1 m/s |
| Max joint speed | 180°/s | 180°/s | 180°/s | 180°/s | 180°/s |
| Arm weight | 11.3 kg | 12.5 kg | 14.3 kg | 8 kg | 20 kg |
| Control box | separate | separate | separate | integrated | separate |
Shared by the xArm 5, 6 and 7, per UFACTORY: typical power draw 200 W (500 W maximum), a 126 mm base footprint, mounting at any angle, Ethernet communication to the control box, and an RS-485 (Modbus RTU) tool connector with 2 digital inputs, 2 digital outputs and 2 analog inputs. The AC control box (100–240 V input) is included by default, and a DC control box is available. UFACTORY states a one-year warranty against manufacturing defects and stress testing to at least 15,000 hours of operation.
Accessories we sell. UFACTORY's current xArm Gripper G2 is rated for a 5 kg payload with an 84 mm stroke and 10–50 N grip force, weighs 800 g and talks RS-485 Modbus RTU through the tool connector. Ask us to confirm the gripper generation on your order if it matters to your code. The 6-axis force torque sensor (model AI1500) measures up to 400 N and 20 N·m at 0.4 N and 0.01 N·m resolution, samples at 200 Hz and weighs 600 g with its adapter. Our listing notes it fits the xArm 5, 6 and 7 from serial XI1305 onward and the UFACTORY 850.
Which xArm should you buy?
- Imitation learning and teleoperation data collection: xArm 6 or xArm 7. Both accept streamed joint or Cartesian targets (see servo mode below) and share drivers with the rest of the family.
- Reaching around fixtures, shelves or a second arm: xArm 7. The seventh joint lets the elbow move while the gripper holds its pose. It gives up 1.5 kg of payload to the xArm 6.
- Planar pick-and-place, sorting, machine loading: xArm 5 is enough when the tool only needs to point down.
- Classrooms, desktops, demos: Lite 6. It is lighter, has the controller in the base and uses the same UFACTORY Studio and SDK, but its 600 g payload and ±0.5 mm repeatability rule out most production tasks.
- Precision work at longer reach: UFACTORY 850, with ±0.02 mm repeatability and 850 mm reach at the cost of a 20 kg arm.
- Torque-controlled contact research: the xArm family does not have joint torque sensors. Pair an arm with the force torque sensor, or compare torque-sensing research arms in our robot arm comparison.
First day with an xArm
These steps follow UFACTORY's xArm hardware manual and UFACTORY Studio manual.
- Mount it properly. UFACTORY asks for a mounting surface that can take at least 10 times the full torsion of the base joint and 5 times the arm's weight. A light desk is not enough. Mark out the working range from the manual before you place people or equipment nearby.
- Connect the cables with AC power off. Plug the arm's power and signal cables into the arm and the control box, then the control box's AC cable into the wall. The connectors only go in one way, so do not force them.
- Network: connect the PC straight to the control box. This is UFACTORY's recommended setup. A router or switch works too. Wi-Fi between the PC and the router is not recommended because of delay and packet loss. UFACTORY's default arm address has the form 192.168.1.xxx, so give your PC a static address on the same subnet.
- Power on in order. Switch on the control box and press its power button. Rotate the emergency stop button to release it, and check that the ROBOT PWR light comes on. Then enable the motors from UFACTORY Studio or with
motion_enable(True)from the SDK. - Open UFACTORY Studio. It runs inside the control box, so there is nothing to install. Browse to the control box address on port 18333 (for example
192.168.1.201:18333). - Set the payload and mounting before teaching. In Studio, enter the TCP payload (your gripper's weight) and the mounting direction. UFACTORY warns that the arm may not hold still in manual (drag-teach) mode if these are wrong.
- Install the SDK and run an example.
pip install xarm-python-sdk, then connect withXArmAPI('<your-arm-ip>')and run one of the examples from the Python SDK repository before writing your own code. - ROS 2 (optional). Clone xarm_ros2 with
--recursiveon the branch matching your ROS 2 release (Humble, Jazzy and Rolling are maintained), runrosdep install, build withcolcon build, then bring up the driver withros2 launch xarm_api xarm6_driver.launch.py robot_ip:=<your-arm-ip>. MoveIt launch files for the real arm are inxarm_moveit_config.
For teleoperation and learned policies: UFACTORY's servo mode (mode 1) executes only the latest target, with no buffer, and the control box accepts up to 250 Hz. UFACTORY recommends streaming smoothed targets at 100–200 Hz. Below about 30 Hz motion can become discontinuous (motion modes). Never send a distant target in one step.
Common errors and what to check first
When the controller reports an error it stops the arm and discards queued commands. You must clear the error (in Studio, or clean_error() and set_state(0) in the SDK) and re-plan. The codes below come from UFACTORY's error handling table:
- C1 or C2, emergency stop pressed. Release the button, then click Enable Robot. This is the most common "it won't move" call after a first power-on.
- C19, end module communication error. The gripper is missing, loose, or set to the wrong baud rate. Reseat the tool connector and check the gripper settings.
- C21, kinematic error. On an xArm 7, re-plan the path. On an xArm 5, xArm 6 or Lite 6, long-press Align to level the flange before moving.
- C22, self-collision. Re-plan. If it persists, switch to manual mode in Live Control and drag the arm back to a normal pose.
- C23 or C24, joint angle or speed over the limit. Send the arm to its Initial Position from Live Control, and check that the target is inside the working range.
- C31, abnormal current. Usually a real collision, or a payload or mounting setting that does not match the hardware. Check both before raising collision sensitivity.
- Drift or sagging in drag-teach mode (C37). The TCP payload or mounting direction is wrong. Fix the settings, then try again.
FAQ
How much does a UFACTORY xArm cost? From $6,000.00 for the xArm 5 in our store today, with the xArm 6 at $9,500.00 and the xArm 7 at $11,798.00. Grippers, sensors and cameras are extra.
xArm 6 or xArm 7? Pick the xArm 6 unless you need to reach around obstacles or control elbow position. It carries 5 kg against 3.5 kg for the xArm 7, and it is simpler to plan for.
Does the xArm support ROS 2? Yes. UFACTORY maintains xarm_ros2 branches for Humble, Jazzy and Rolling, with drivers, MoveIt configurations and Gazebo models for the xArm 5, 6 and 7, Lite 6 and UFACTORY 850.
Does it come with a gripper? No. The gripper and force torque sensor are separate listings. Both connect through the arm's tool connector and are controlled from the same SDK.
Is the xArm a collaborative robot? UFACTORY offers collision detection on all its cobots and supports hand-guided teaching. Whether a specific application is safe to run next to people still depends on your risk assessment, tooling and speeds.
Can I lease or try one first? Yes. See leasing, or contact us to see an arm at our San Francisco lab.