

Orientation
Get oriented with the LinkerBot O6 learning path. Hardware overview, CAN bus basics, safety checklist, and what you'll build. ~45 minutes.
Unit 0 of 5 · Orientation · ~45 min
Understand what the LinkerBot O6 is, how CAN bus communication works, what you'll build in this path, and confirm you have everything you need before opening the box.
This is an orientation unit — no hardware required yet. Read through and confirm all prerequisites before proceeding to Unit 1.
What Is the LinkerBot O6?
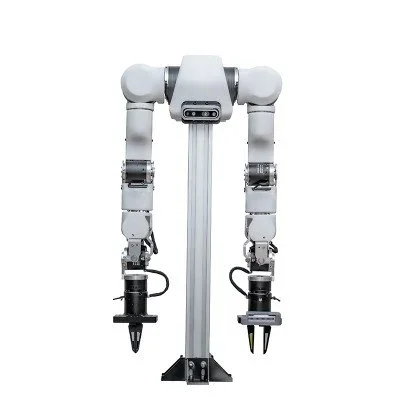
The LinkerBot O6 is a 6-degree-of-freedom collaborative robot arm designed for tabletop manipulation research and imitation learning. It communicates over a CAN bus interface — the same SocketCAN stack used by the OpenArm 1 — making it straightforward to integrate with ROS2 and LeRobot data pipelines.
Degrees of Freedom
6 DoF
Communication
CAN bus
Control Rate
500 Hz
Payload
3 kg
Reach
~600 mm
Interface
SocketCAN / USB-CAN
How CAN Bus Works (the short version)
CAN (Controller Area Network) is a serial bus protocol that the O6 uses to send joint commands and receive joint feedback at high frequency. Your computer connects to the arm via a USB-to-CAN adapter. Linux exposes it as a network interface called can0. You configure it once per boot (or via udev rules) and then any program can open a socket on it.
If you have completed the OpenArm 1 path, the CAN setup is identical. If not, Unit 1 covers the full setup from scratch.
What You'll Build in This Path
- A working CAN bus connection and verified joint state readout.
- A ROS2 control interface driving all 6 joints.
- A live teleoperation session using either keyboard, SpaceMouse, or leader-follower hardware.
- A LeRobot dataset with 50+ high-quality demonstration episodes.
- A trained ACT or Diffusion Policy checkpoint achieving ≥70% success on your task.
Prerequisites Checklist
- Ubuntu 22.04 LTS installed and updated (
sudo apt update && sudo apt upgrade) - ROS2 Humble installed and sourced (
ros2 --versionreturnshumble) - Python 3.10+ with
pipavailable - Basic Linux command line familiarity (cd, ls, sudo, apt)
- Basic Python familiarity (import, functions, loops)
- ~10 hours available across the path
Hardware Checklist
- LinkerBot O6 arm unit
- Power supply (supplied with arm)
- USB-to-CAN adapter (PEAK PCAN-USB or compatible)
- Mounting plate or bench clamp — arm must be secured before powering on
- USB webcam or RealSense (for data collection in Units 4–5)
Safety Basics
The O6 is a collaborative arm rated for safe human proximity, but standard precautions still apply:
- Always mount the arm before powering on. An unmounted arm will tip or swing when joints move.
- Keep hands clear of the workspace when running scripts for the first time.
- The arm does not have an integrated e-stop button. Close your terminal or press Ctrl+C to halt a running script. Consider this your software e-stop.
- Start with slow joint velocities (below 30% of maximum) until you understand the arm's motion range.
Path Time Breakdown
| Unit | Topic | Time |
|---|---|---|
| 0 | Orientation | 45 min |
| 1 | Hardware Setup | 1.5 h |
| 2 | Software & SDK | 2 h |
| 3 | First Teleoperation | 1.5 h |
| 4 | Data Collection | 2 h |
| 5 | Train & Deploy | 3 h |
Unit 0 Complete When...
You have reviewed all prerequisites and confirmed you have the required hardware, software, and time. You understand CAN bus at a conceptual level. You have read the safety basics. You are ready to physically set up the O6 in Unit 1.