


RC G1 Tactile Glove — Linux Setup
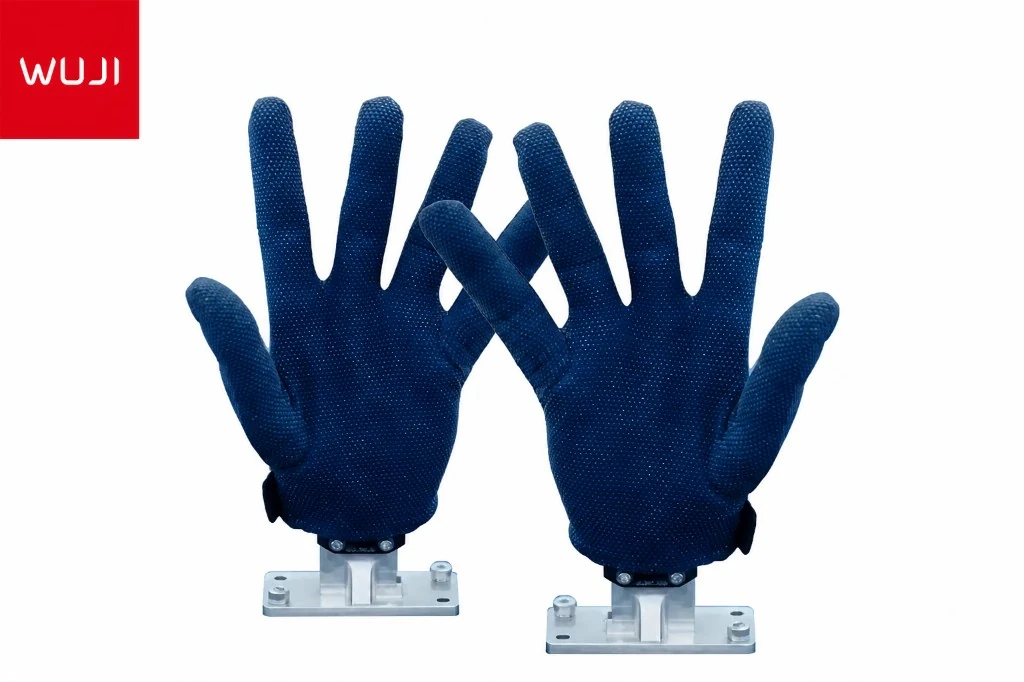
Use the RC G1 Tactile Glove on Ubuntu, Debian, or any modern Linux. The vendor GUI is Windows/macOS only — this guide walks through udev rules, the documented serial protocol, and a 60-line Python reader.
The companion GUI ships for Windows and macOS only. On Linux you talk to the glove directly over USB-serial using a documented binary protocol — no proprietary drivers required, since the CH340 module is supported by the in-kernel ch341 driver shipped in every modern distro. This guide gives you a 60-line Python reader that streams 162-channel pressure plus 6-axis IMU at 100 Hz, plus udev rules and a systemd service for production deployments.
Tactile Sensing Total time: about 45 minutes Difficulty: Intermediate Updated May 2026
Tested on: Ubuntu 22.04, Ubuntu 24.04, Debian 12, Fedora 40. Kernel 5.4 or newer has the ch341 driver built-in — no DKMS needed.
What you will accomplish
By the end of this guide you will have a working Linux pipeline: the glove streams over USB-serial or Bluetooth into a stable /dev/rc-g1-glove-0 device, a Python process decodes the two-packet frame protocol at 100 Hz, and a systemd unit keeps it running across reboots. The same reader pipes cleanly into the RC Data Platform for dataset recording.
Prerequisites
- Hardware: RC G1 Tactile Glove, data-acquisition module (charged), USB-A Bluetooth dongle or USB-A to USB-C wired serial cable.
- OS: any Linux distribution on kernel 5.4 or newer. This guide is written against Ubuntu 22.04 / 24.04, Debian 12, and Fedora 40.
- Skills: comfortable with the shell,
systemctl, and reading short Python.
The steps
Confirm the kernel driver is present
Modern Linux kernels (5.4+) bundle
ch341for the CH340 USB-serial chip used by the data-acquisition module. Plug the USB-A Bluetooth dongle or the USB-A to USB-C serial cable into the host and run:dmesg | tail -20You should see a line like:
[ 1234.567890] usb 1-2: ch341-uart converter now attached to ttyUSB0If you do not see it, install the extra modules package:
# Ubuntu / Debian
sudo apt install -y linux-modules-extra-$(uname -r)

# Fedora
sudo dnf install kernel-modules-extra
Then unplug, replug, and re-check
dmesg. The CH340 is the most widely-deployed USB-serial chip on the planet — if it does not enumerate, suspect a bad cable before suspecting your kernel.Add yourself to the dialout group
On Debian and Ubuntu, the serial device is owned by
root:dialout. You need to join the group:sudo usermod -aG dialout $USERThen log out and log back in, or run
newgrp dialoutin your current shell. Without this, any user-space reader fails with:serial.serialutil.SerialException: [Errno 13] Permission denied: '/dev/ttyUSB0'On Fedora the equivalent group is
dialoutas well; on Arch it isuucp. Verify withls -l /dev/ttyUSB0.Install a deterministic udev rule (optional but recommended)
Without a udev rule, the kernel assigns
/dev/ttyUSB0on a first-come basis, which is fragile if you have multiple gloves plugged in or if the dongle moves to a different USB port. Create:sudo tee /etc/udev/rules.d/99-rc-g1-glove.rules >/dev/null <<'EOF' # RC G1 Tactile Glove — CH340 serial (WCH 1a86:7523) SUBSYSTEM=="tty", ATTRS{idVendor}=="1a86", ATTRS{idProduct}=="7523", MODE="0660", GROUP="dialout", SYMLINK+="rc-g1-glove-%n" EOFReload the rules:
sudo udevadm control --reload-rules && sudo udevadm triggerNow your device shows up as
/dev/rc-g1-glove-0regardless of plug order. Multiple gloves get-0,-1,-2based on enumeration order, but each one keeps its symlink for the lifetime of the plug-in.Pair over Bluetooth using BlueZ (optional path)
If you would rather use the wireless dongle than a USB cable, plug the dongle in — it presents itself as a CH340 serial port, not a HID device — then use the firmware's AT command set on that port at
921600baud:sudo apt install -y screen screen /dev/rc-g1-glove-0 921600Inside the
screensession, type the AT commands:AT+SCAN=1 # → +SCAN=2,3C8A1F2E9A36,-1,23,JQ-RH_3C:8A:1F:2E:9A:36 ← copy this MAC AT+CONN=3C8A1F2E9A36 # → OK (and then binary sensor data starts streaming — exit screen with Ctrl-A k)The firmware advertises one of
JQ-LH(left hand),JQ-RH(right hand),JQ-LF(left foot),JQ-RF(right foot), orJQ-WB(whole-body) depending on which module you are pairing. Match the suffix to your physical device. Once paired, all subsequent reads on the dongle's serial port give you live sensor frames — the pairing is persistent on the dongle, so only re-pair if you swap modules.BlueZ note: you do not need
bluetoothctlor the host's BlueZ stack — the dongle handles BLE in firmware and exposes a transparent serial link. Treat it as a wireless extension cord.Install Python dependencies
System-wide install works, but a virtualenv keeps things tidy:
python3 -m venv ~/.venv/rc-g1
source ~/.venv/rc-g1/bin/activate
pip install pyserial numpy
If you prefer a system install:
python3 -m pip install --user pyserial numpyPython 3.9 or newer is required.
pyserialprovides the cross-platform serial layer,numpyis used for the pressure-frame buffer.Write the reader
Create
~/rc-g1-glove/reader.pywith the following contents. This is the full file — about 60 lines — and it is the most useful thing on this page. Read the docstring first; the frame format is the part most people get wrong.#!/usr/bin/env python3 """Minimal serial reader for the RC G1 Tactile Glove. Frame format (per vendor protocol spec, v1.2): [Header 4B: 0xAA 0x55 0x03 0x99] [Packet seq 1B: 0x01 or 0x02] [Sensor type 1B: 0x01=LH, 0x02=RH, 0x03=LF, 0x04=RF, 0x05=WB] [Payload] seq 0x01: 128 bytes — first 128 of 256 raw pressure values (8-bit ADC each) seq 0x02: 144 bytes — last 128 pressure values + 16 bytes IMU (4 floats: w, x, y, z quaternion) Two packets together = one full frame (256 pressure points, of which 162 are physically wired to fabric sensors; the remaining slots read ~0 and can be masked). Wired streaming = 100 Hz, Bluetooth = 30 Hz. """ import argparse, struct, sys, time import serial import numpy as np HEADER = b"\xAA\x55\x03\x99" SENSOR_NAMES = {0x01: "LH", 0x02: "RH", 0x03: "LF", 0x04: "RF", 0x05: "WB"} def read_frame(port: serial.Serial): # Sync to header buf = b"" while True: buf += port.read(1) if buf.endswith(HEADER): break if len(buf) > 4096: raise IOError("lost sync — no header in 4 KB") seq, sensor = port.read(1), port.read(1) if not seq or not sensor: raise IOError("short read on header trailer") seq, sensor = seq[0], sensor[0] payload_len = 128 if seq == 0x01 else 144 payload = port.read(payload_len) if len(payload) != payload_len: raise IOError(f"short payload: got {len(payload)}/{payload_len}") return seq, sensor, payload def main(): ap = argparse.ArgumentParser() ap.add_argument("--port", default="/dev/rc-g1-glove-0") ap.add_argument("--baud", type=int, default=921600) args = ap.parse_args() with serial.Serial(args.port, args.baud, timeout=1) as port: print(f"Reading from {args.port} @ {args.baud}…", file=sys.stderr) half = None t0, n = time.time(), 0 while True: seq, sensor, payload = read_frame(port) if seq == 0x01: half = payload # stash first half continue if seq != 0x02 or half is None: continue # Combine the two halves raw = np.frombuffer(half + payload[:128], dtype=np.uint8) # 256 pressure pts imu = struct.unpack("<ffff", payload[128:144]) # quaternion w,x,y,z n += 1 if n % 100 == 0: hz = n / (time.time() - t0) side = SENSOR_NAMES.get(sensor, hex(sensor)) peak = int(raw.max()) print(f"[{side}] frames={n} rate={hz:5.1f} Hz peak={peak:3d}/255 quat={imu}", file=sys.stderr) if __name__ == "__main__": main()Run it:
python3 reader.py --port /dev/rc-g1-glove-0You should see a status line every 100 frames showing the sample rate. Squeeze a fingertip and watch
peakclimb — the maximum pressure value across the 256-channel buffer.(Optional) Run as a systemd service
For headless deployments — data-collection cells, lab benches, or robots in the field — wrap the reader in a templated systemd unit so it auto-restarts on crash and starts on boot. Drop the following into
/etc/systemd/system/rc-g1-reader@.service:[Unit] Description=RC G1 Tactile Glove reader (%i) After=local-fs.target [Service] Type=simple User=robotics ExecStart=/home/robotics/.venv/rc-g1/bin/python /home/robotics/rc-g1-glove/reader.py --port /dev/%i Restart=on-failure RestartSec=2 [Install] WantedBy=multi-user.targetEnable and start:
sudo systemctl daemon-reload
sudo systemctl enable --now rc-g1-reader@rc-g1-glove-0.service
Follow the logs:
journalctl -u rc-g1-reader@rc-g1-glove-0.service -fThe
@%itemplate lets you run multiple instances side-by-side — e.g.rc-g1-reader@rc-g1-glove-0andrc-g1-reader@rc-g1-glove-1for a dual-hand rig — without duplicating the unit file.Stream into the RC Data Platform
The reader prints status to stderr and (in production) writes frames to stdout in any format you like. The easiest path to RC Data Platform ingestion is the RCSV CLI:
pip install centeros-cli
centeros auth login
python reader.py --port /dev/rc-g1-glove-0 | centeros stream --hardware rc-g1-tactile-glove --operator-id <you>
The CLI handles authentication, retry, and chunked upload to the platform's ingest WebSocket. See the SDK quickstart for the full reference, including how to attach episode metadata (task name, scene labels, hand side) on the same command line.
Frame layout and ROS 2 examples
The reader above produces, per full frame, a flat 256-element uint8 array of pressure values plus a 4-float quaternion. The 256 slots correspond to a 16x16 grid in the firmware's internal addressing scheme, of which 162 are physically wired to fabric sensors on the palm and fingers; the remaining slots read approximately zero and can be masked when you build derived features. The channel-to-finger mapping table lives on the Data Protocol reference page — print it once and tape it next to your bench.
For ROS 2 integration, wrap reader.py in an rclpy.node.Node that publishes a std_msgs/Float32MultiArray per hand at 100 Hz, plus a sensor_msgs/Imu for the quaternion. We are publishing a reference driver soon at github.com/robotics-center/rc-g1-ros2-driver — the pattern is straightforward: spawn a background thread that runs the read loop, push frames into a thread-safe queue, and let a 100 Hz ROS timer drain the queue and publish.
Throughput sanity check: 100 Hz x (256 bytes pressure + 16 bytes IMU + 12 bytes framing) = ~28 KB/s per hand. The CH340 at 921600 baud has ~115 KB/s of usable bandwidth, so wired single-hand streaming uses about a quarter of the link.
Troubleshooting
Permission denied on /dev/ttyUSB0: you forgot Step 2 (dialout group). Re-login after usermod — group membership is only picked up on a fresh session.
No /dev/ttyUSB* appears on plug-in: the ch341 module is not loaded. Run sudo modprobe ch341 to confirm. If the modprobe fails with "module not found", install linux-modules-extra-$(uname -r) (Ubuntu) or kernel-modules-extra (Fedora) and retry.
lost sync — no header in 4 KB: the data-acquisition module went into 1-minute idle standby to save battery. Short-press the power button on the module to wake it — the reader will resume on the next valid header.
Reader runs at 50 Hz instead of 100 Hz: you are on Bluetooth (30 Hz nominal; some hosts measure ~50 Hz including retries). Switch to the wired USB-C cable for the full 100 Hz.
Frames decode garbage / IMU quaternion is NaN: verify baud is 921600. The firmware also supports 3 000 000 baud for high-speed wired mode; set the reader to that with --baud 3000000 if you have configured the module accordingly. The default factory baud is 921600.
Two gloves connected, only one streams: check that the udev rule from Step 3 is producing two symlinks (ls /dev/rc-g1-glove-*). If only one appears, the second module is on a different USB vendor/product ID — run lsusb and add a second rule with the matching IDs.
What to do next
Once a single hand is streaming reliably, the high-value next steps are: (1) calibrate the pressure baseline per-channel by recording 5 seconds of an idle hand and subtracting the mean, (2) bring up the second hand and verify both stream simultaneously into the platform, and (3) record a labeled dataset using the centeros CLI's episode mode — this is where the glove starts paying for itself.